Monday, September 29, 2008

Happy Owloween Card

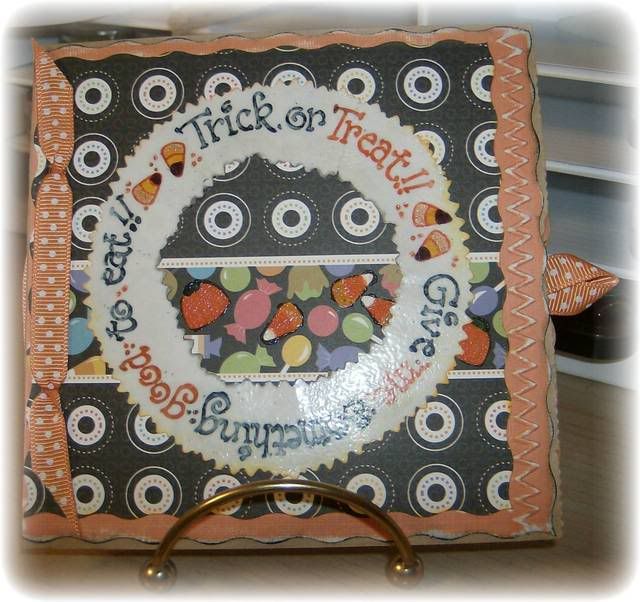
This card was a learning experience using Design Studio. I created the card as one cutout in the gray cardstock, and cut out the layers separately. The background star paper should be on the inside of the card but my cardstock wasn't quite heavy enough to leave the "window" open. So I had to attach it to the back of the image. My cut file worked great so I can recreate this card when I get heavier cardstock.

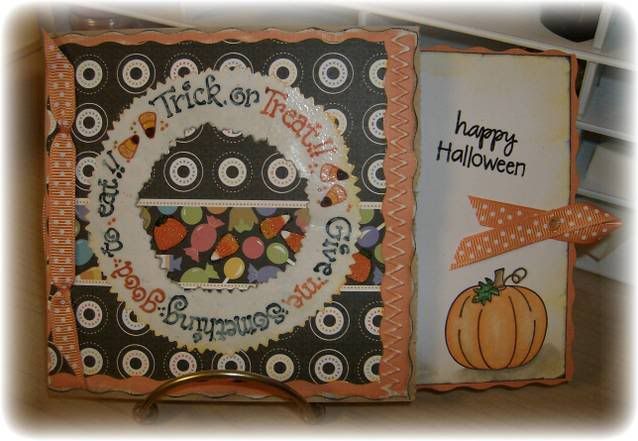
I used Design Studio plus 6 different cartridges. Animal Kingdom for the Owl, Doodlecharms for the Pumpkin and Spider, George for the Moon, Opposites Attract for the word Owloween, Pooh & Friends for the Tree Branch, and Walk In My Garden for the word Happy.

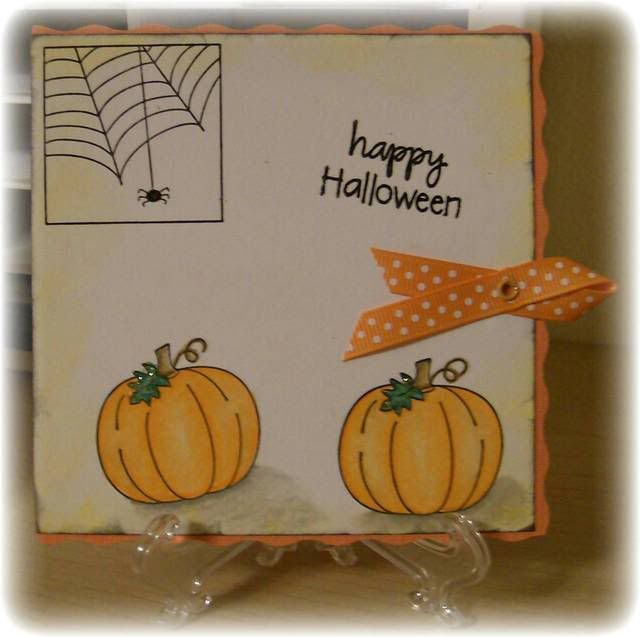
The owl was cut at 2". I flocked the spider and added wiggle eyes. The pumpkin face is a stamp from Peachy Keen stamps and yellow stickles were added to the eyes and mouth. The doodles on the edge of the card were made with orange glitter gel pen and black stickles for the dots. The tree branches are 2 separate cuts that are overlapped. I had some patterned paper that looks like wood which really turned out perfect for the branches.

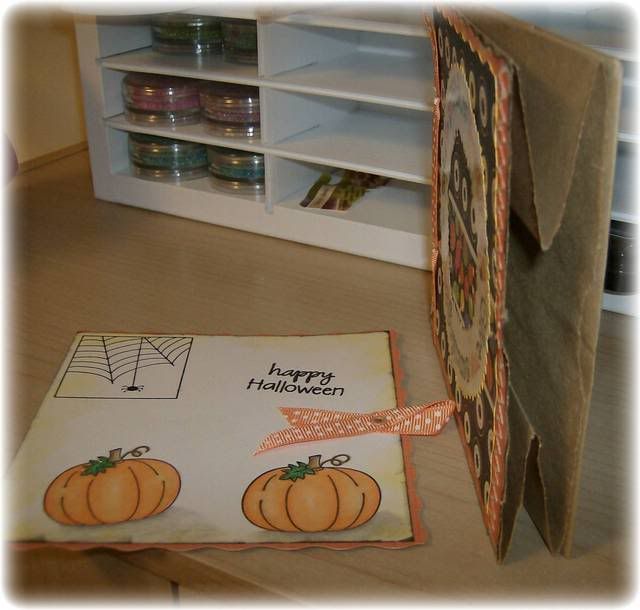
I learned many things creating this cut file. I won't be so hesitant to really put Design Studio to use in the future.

Monday, September 22, 2008

Sarah Kay Birthday Card

This is a birthday card for a lady at work that is turning 50! I used a computer printed Sarah Kay image. Colored her with Prismacolor pencils and blended with Gamsol. Stickles were added to a few of the flowers and to the ribbon on the hat. I used the Happy Birthday Cuddlebug embossing folder for the background. I lightly went over the embossing with pink chalk ink. (BTW the ribbon is not really crooked, but for some reason it looks crooked in the picture???)


I don't usually do much on the inside of a card or the envelope but I was feeling crafty tonight and decorated both. The corner stamp is a Studio G #11 that I stamped in black dye ink then went over with glitter gel pens. The birthday cake stamp is a $1 stamp I found at JoAnn's. I also colored it with glitter gel pens and wrote 50 in the center.


Sunday, September 21, 2008

Making a faux bow

Instructions for making a faux bow. Simple and fast!

You will need a ruler, marker, hole punch, ribbon & cardstock.


More Halloween lunch bag cards

Jasmine Cartridge used for the corners, George Cartridge + Design Studio used to create the candy corn.


I used the masking technique to stamp the pumpkins & leaves in this one.


The pumpkin is flocked on the pull-out.

Friday, September 19, 2008

Lunch bag Halloween Card


This was so much fun to make! I received a super "goodie" package from my Not-So-Secret-Sister and I couldn't wait to create! I saw the directions for a card made with a lunch bag and thought it was the cutest idea. All the items used for this card (except for the orange cardstock) were in my package. The ring stamp is the neatest stamp I have ever seen. I used watercolor markers to color the stamp. Stamped it onto white cardstock then covered the entire paper with VersaMark Watermark ink. Sprinkled clear embossing powder over the top of the whole thing and heat set it. Then using sissors I cut it out.
To create the card, use an everyday lunch bag. Fold it in half, then use double sided tape to hold it together. That's it!

There is a pull-out inside the bag.


I stamped the pumpkins with black die ink then colored with Prismacolor pencils and blended with gamsol. Stickles were added to the leaves.


Here is a side view of the card:


The paper is from the DCWV's Fall Glitter Stack. I added embossing and glitter gel pens to some of the candy to add sparkle.

Sunday, September 14, 2008

Christmas Fishes

This is a silly Christmas Card! Used ZooBalloo cartridge and Design Studio to cut the waves. I welded a rectangle to the bottom of the waves to get the piece to cut out as one solid water piece. The clouds were cut at 1 1/2" and inked with cyan & silver Colorbox pigment inks.The fish is a clear stamp from Cornish Heritage Farms. I stamped him twice. Cut out the red portion of the hat on one and the entire fish on the other. Ran the hat piece upside down through my Xyron and adheared red flock. Colored the fish using PrismaColor pencils. Stickles were added to just the fins to give Mr. Fish some sparkle. I used lots of Stickles on this one. The ovals were cut with nestabilities. Then I poked holes around the edge of the white oval and connected the holes with a black pen. Using alternate stickles of red, green & goldenrod I dotted each hole so that it looks like a string of Christmas lights. You can't tell in the picture but I pop dotted the fish onto the paper. I also used pop dots under the tips of the waves to raise them up and give them some depth. A snow writer was used to add the sparkle to each wave. (Boy that stuff takes a long time to dry, but worth the wait!) The bubbles are self-sticking acrylic dots made by Fiskars.


Saturday, September 13, 2008

Peace Christmas Card

I challenged myself to use only my cricut and cuddlebug to make a card. I seem to have gotten into the habit of using stamps exclusively. So I thought it was about time I dusted off the 2 bugs and got to work. I used Joys of the Season for the word peace and the star. This is gold velum cut at 1 1/2". I wanted to use my new cuddlebug dove and branch die and embossing folder. I die cut the dove and branch out of white cardstock then embossed with the folder. I inked up my brayer with VersaMark ink and gently rolled over the top of both pieces. Enchanted Gold embossing powder (by Ranger) was sprinkled over the VersaMark and then heat set. I love the shimmer of this embossing powder! The oval circles were cut using Nestabilities. Finally a few doodle dots using a gold marker to finish it off.

I'm trying not to put too many 3-D embellishments on my cards since the post office has a hard time with a card that isn't flat. With the heavy load of mail that goes through at Christmas time I figured I'd rather be safe than sorry!

Thursday, September 11, 2008

SheetLoad ShortCuts - BLOG CANDY!

SheetLoad ShortCuts: New product previews- blog candy!
Hurry! This terrific new product is being offered as blog candy but you must get your entry in before midnight tonight! What's the product? Clear and Frosted plastic card blanks! They are totally awesome! You can check them out at SheetLoad ShortCuts.

Sunday, September 7, 2008

House Mouse "Having a Ball" Christmas Card


How can anyone resist this little cutie? I thought he looked lonley all by himself so I added 2 of his friends to keep him company. Of course I colored them with Prismacolors and blended the colors with unscented mineral spirits. The striped paper is from DCWV's Winter Glitter Mat Stack and the "snow" paper is Heidi Grace. I used Martha Stewart's Lace border punch to soften the lower edge. The Holly Leaves are a clear acrylic stamp from a set by PrintWorks called Celebrate Christmas. I stamped the leaf twice with VersaMark Watermark ink and embossed with "Silver Tinsel" embossing powder by Stampendous. I added Red liquid pearl dots for the holly berries. The "Merry Christmas" was also stamped with VersaMark and embossed with black embossing powder.

House Mouse "Wrapped & Ready" Christmas Card


These cute little guys made me smile the entire time I was creating this card!

The image is stamped with Stampin' Up's Basic Black and colored with the magic gamsol technique. I added stickles to parts of the bows and inked the edges with gold pigment ink.


The paper is Paper Studio from Hobby Lobby. Gold vellum was used to mat the House Mouse image.

The holly leaves were stamped with VersaMark Watermark then embossed using Ancient Gold "Enchanted Gold" embossing powder by Ranger. The holly leaf stamps are from Peach Keen Stamps. I like them because the set came with a "left" and a "right" stamp.

Saturday, September 6, 2008

Silly String Attack!

We had tons of fun last week at work! I know work isn't supposed to be fun, but we celebrated someone's birthday. Since Tim is a "Fun Loving" guy, we decided to attack him with silly string. He really enjoyed the attack and we all laughed so hard because he looked like Cousin It from the Adam's Family when we were done! I got a couple of the pictures that were taken and created this layout. I put it in a scrapbook frame and he can hang it on his wall at the office.

The title was cut using ZooBalloo & All Mixed Up fonts. I used DS to weld the shadows of the letters together. Swirls were cut from Accent Essentials. The Pointing hands are from Mickey & Friends. The "ric rack" is actually chipboard that I colored with alcohol inks. I also dotted the title with silver alcohol ink to spice it up a bit. The image is dark because I forgot to take the picture until after I had put it in the frame and the glass front reflected any flash or window light.